A speaker cabinet project
Near the end of 2015 I started on a project to build my own 2×10 guitar amp speaker cabinet. Working on it sporadically since then I finally finished it this year. I hadn’t done any woodwork – let alone joinery – in 20 years so this seemed like it was a fairly ambitious undertaking. Initially I anticipated getting help from friends and family with woodworking experience and tools. Things worked out different and I built this almost entirely myself.
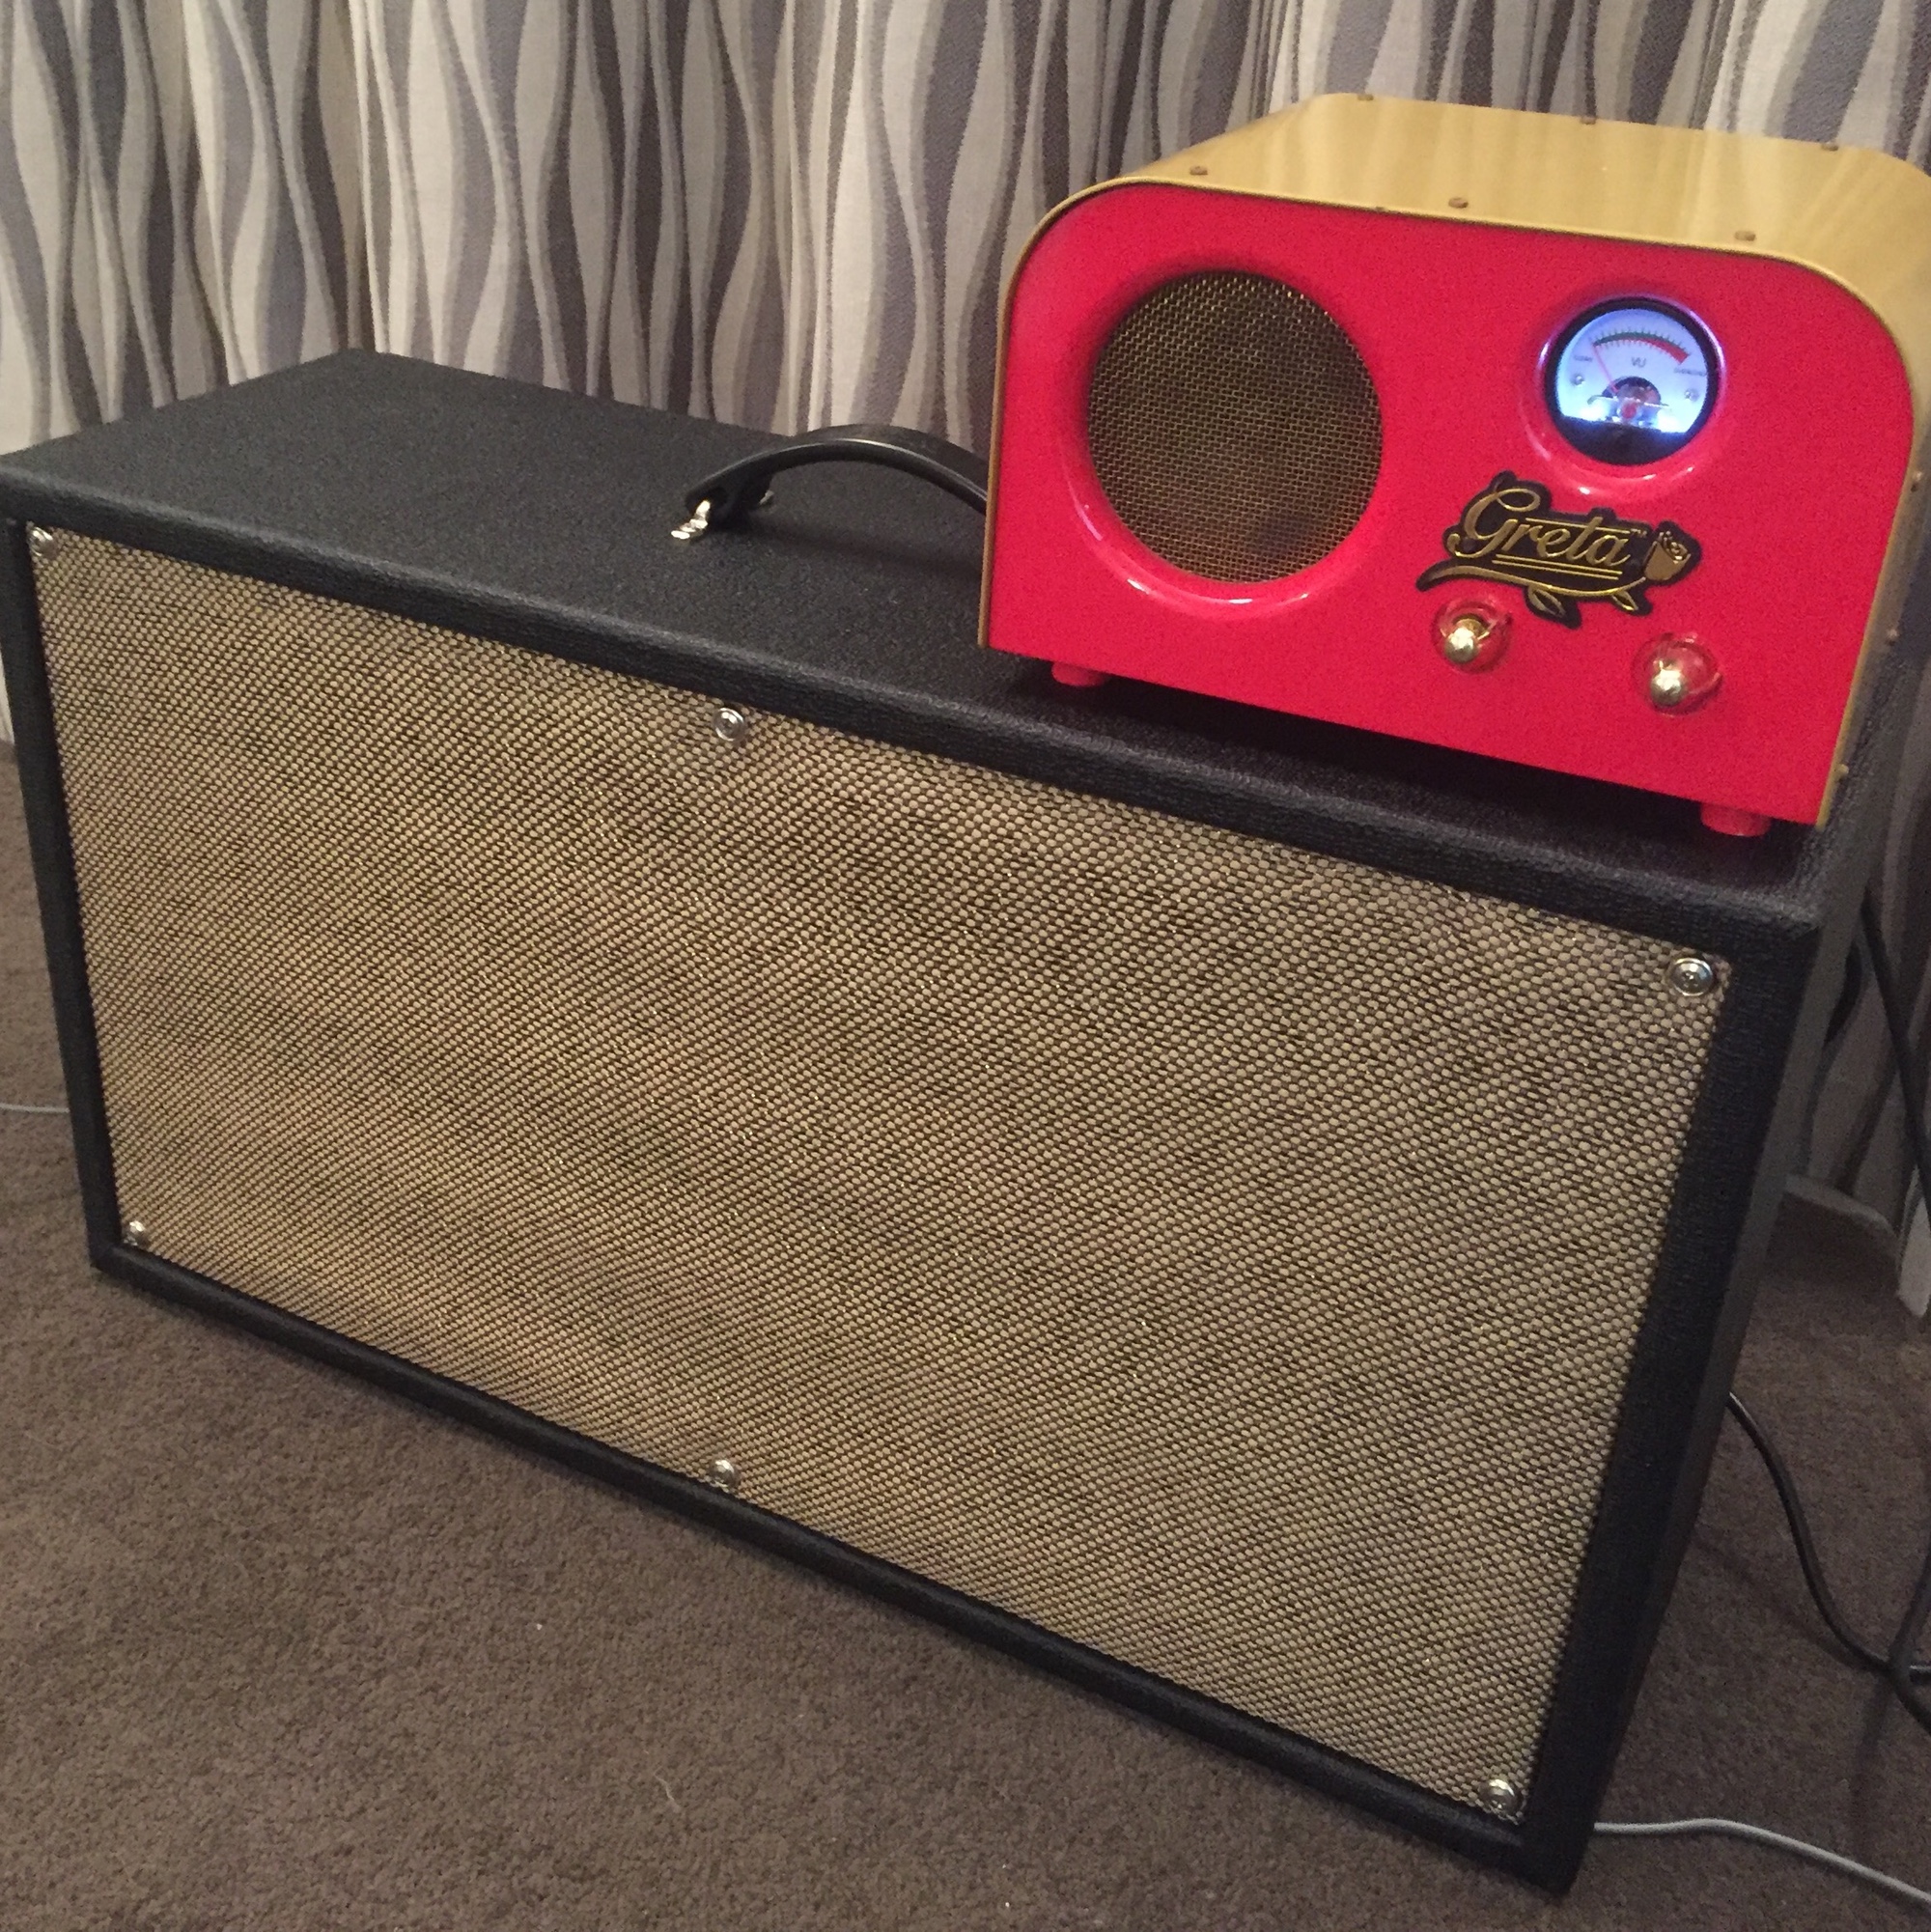
The finished cabinet
While there are some fussy details in a project of this nature, I would estimate it’s really only a 2 out of 5 in terms of difficulty. As long as you plan ahead, practise each technique you need first, this is an achievable project for a beginner. The only caveat is that it is time consuming.
Designing the cab
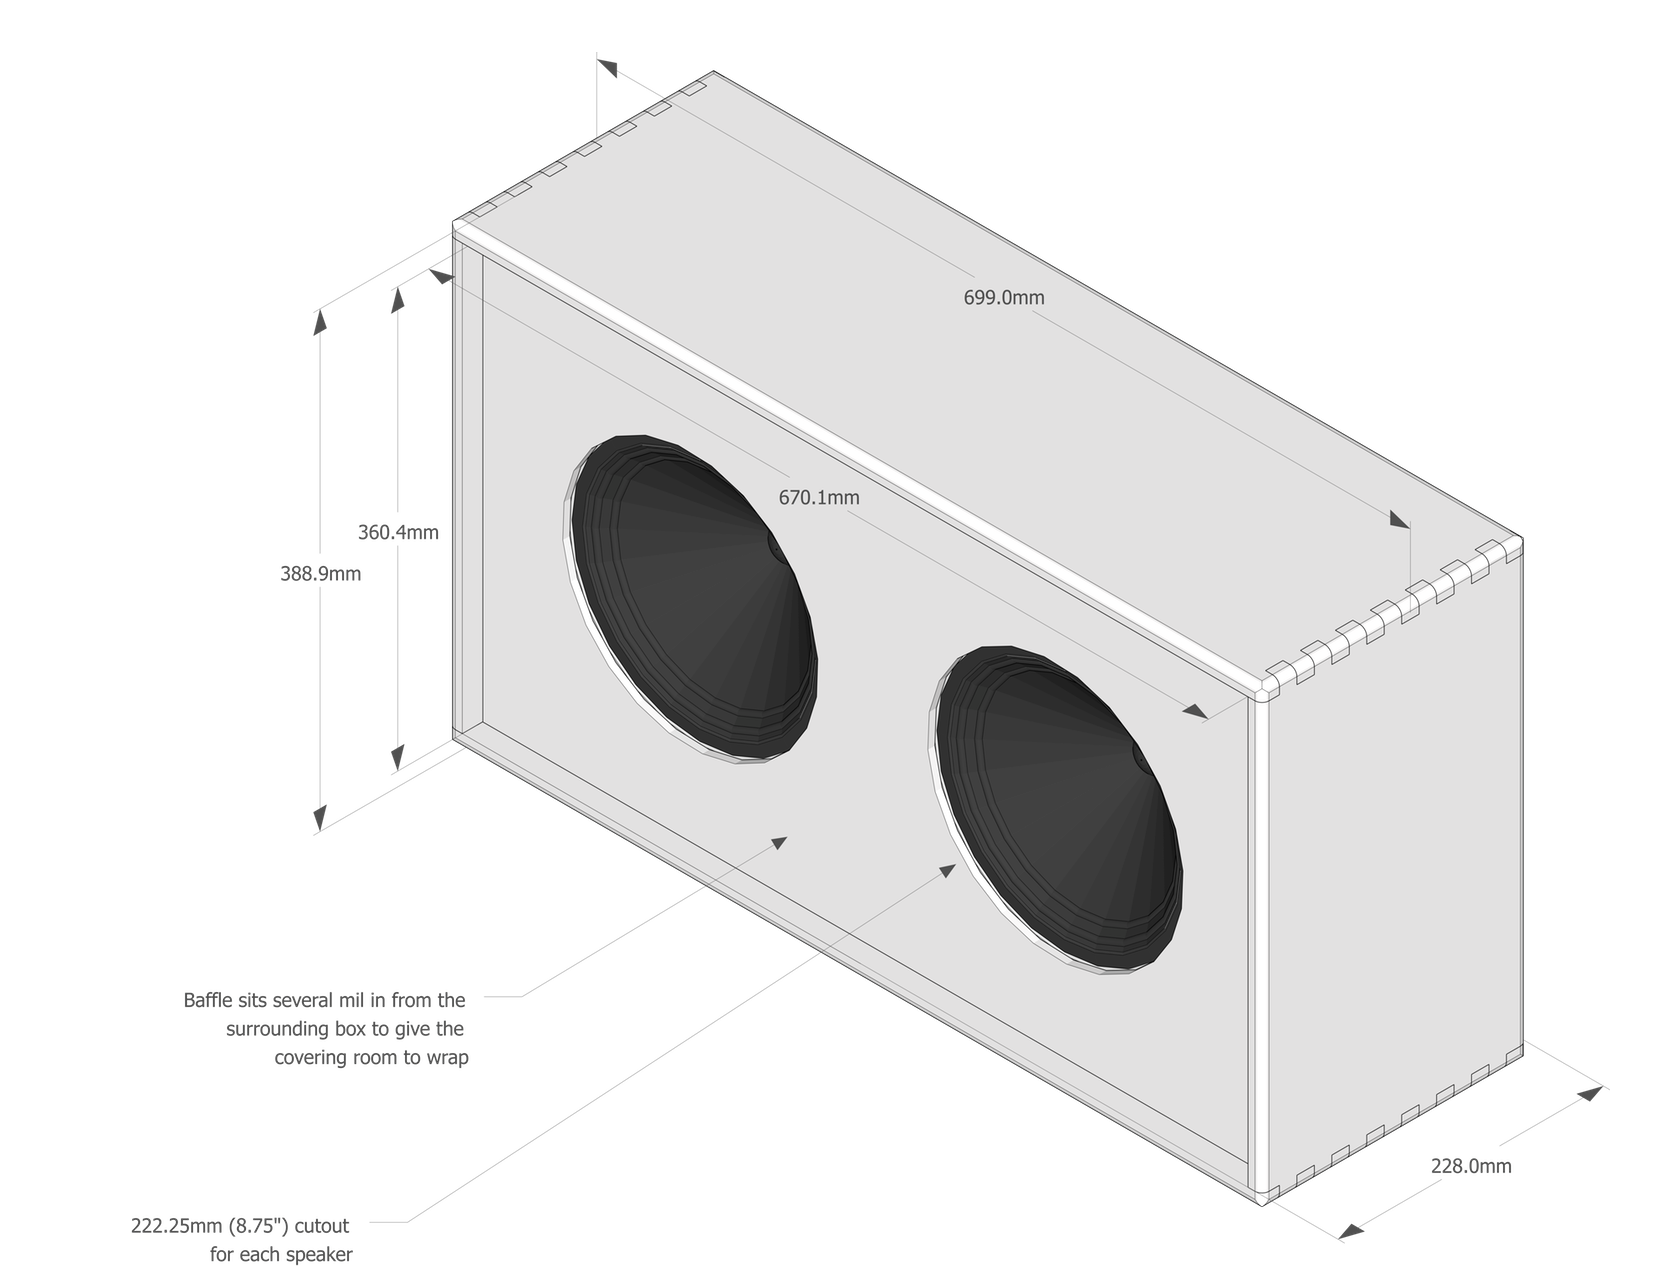
The initial design for the project.
This design is heavily inspired by videos on YouTube from Uncle Doug. I've linked these out before, but his series on building a pine cabinet for a small amp was invaluable for this project. He has a prior series in which he builds the amp in question from spare parts in his workshop. Here are the relevant videos:
- Constructing a Finger-Jointed Pine Amplifier Cabinet (part 1)
- Constructing a Finger-Jointed Pine Amplifier Cabinet (part 2)
- Covering an Amp In Tolex or Leatherette (part 1)
- How to Cover A Speaker Baffle with Grill Cloth
- Covering an Amp In Tolex or Leatherette (part 2)
Uncle Doug’s cabinet aligned fairly closely with what I wanted for my own project. I had decided to build a vintage inspired design with simpler aesthetics, and a sound reminiscent of classic Fender open back combo amps. Open back has the advantage that you don’t need to do any math to figure out the size of the cabinet for acoustics.
A word on materials. I chose to use clear, dressed, pine boards for the box itself, and with MDF for the speaker baffle. The other common choice for cabinets from the big amplifier brands is birch plywood. The choice here is dictated in part by the sound you want as well as the tools and methods you have available. Marine grade ply (ply with no voids in the middle sheets) is hard to get in New Zealand, and really requires you work with a table saw. Along the way I decided that I wanted to be able to use hand tools as much as possible for this project which was a major factor in deciding on pine.
While I have provided my designs, I would encourage you to draw up their own plans themselves. This step forced me to consider the construction approach and how everything would fit together. Not to mention, there were a number of small deviations from the plan that I realised I needed to make as I was building the project.
I should also mention that this is the first time I have used the Sketchup 3D modelling program. It took me a couple of weeks to learn the application and make the plans.
Deviations from the plans
While I’m sure there are small details I have forgotten, here are the major points:
- The internal cleats and frame changed to have the corner cleats shorter and the horizontal frame longer so that instead of screwing the baffle into end grain, it screws into the edge grain of the top frame. This is a simple change to increase the durability of the unit.
- While the dimensions on the design are approximately correct, they all got jiggled a little once I had the real speakers and timber. The major change is the depth. I originally planned the build to be deep enough for an alnico speaker with its deeper magnet cover, and plausibly to use plywood construction. I ended up using ceramic magnets and the depth was dictated by the availability of pine boards.
- The placement of the input socket socket changed from being mounted through the back board to behind it. There is more detail about this below.
Speaker selection
Selecting speakers for a cabinet project is a major consideration, perhaps the biggest. There are many ways to choose, and many options to choose from. I opted to get speakers from Weber Speakers as they specialise in replicating the tone of speakers used in classic Fender amp designs, they have many great resources on the site, and importantly provide a service where you can get assistance from an expert who will make recommendations based on your requirements.
The build
The first job to do was to construct the main structure of the cabinet. This involved cutting dovetails on side boards, and pins on the top and bottom, gluing it together, and fitting the internal framing. At this stage the joints are all made mechanically, with PVA glue supporting the mechanical joins. In addition to the dovetails which form a very strong join, the internal frame uses an interference fit to ensure nothing moves, and further lock the dovetails in place.
Originally (as seen in the plans) I had intended to use a simple finger joint for the cabinet using a table saw jig, but once I switched to the hand tools approach, it became clear that dovetails would be just as easy and offer a stronger join. I went with tails on the side boards and pins on the top so that when the cabinet is being carted (via the handle) its not working to pull the cabinet apart.
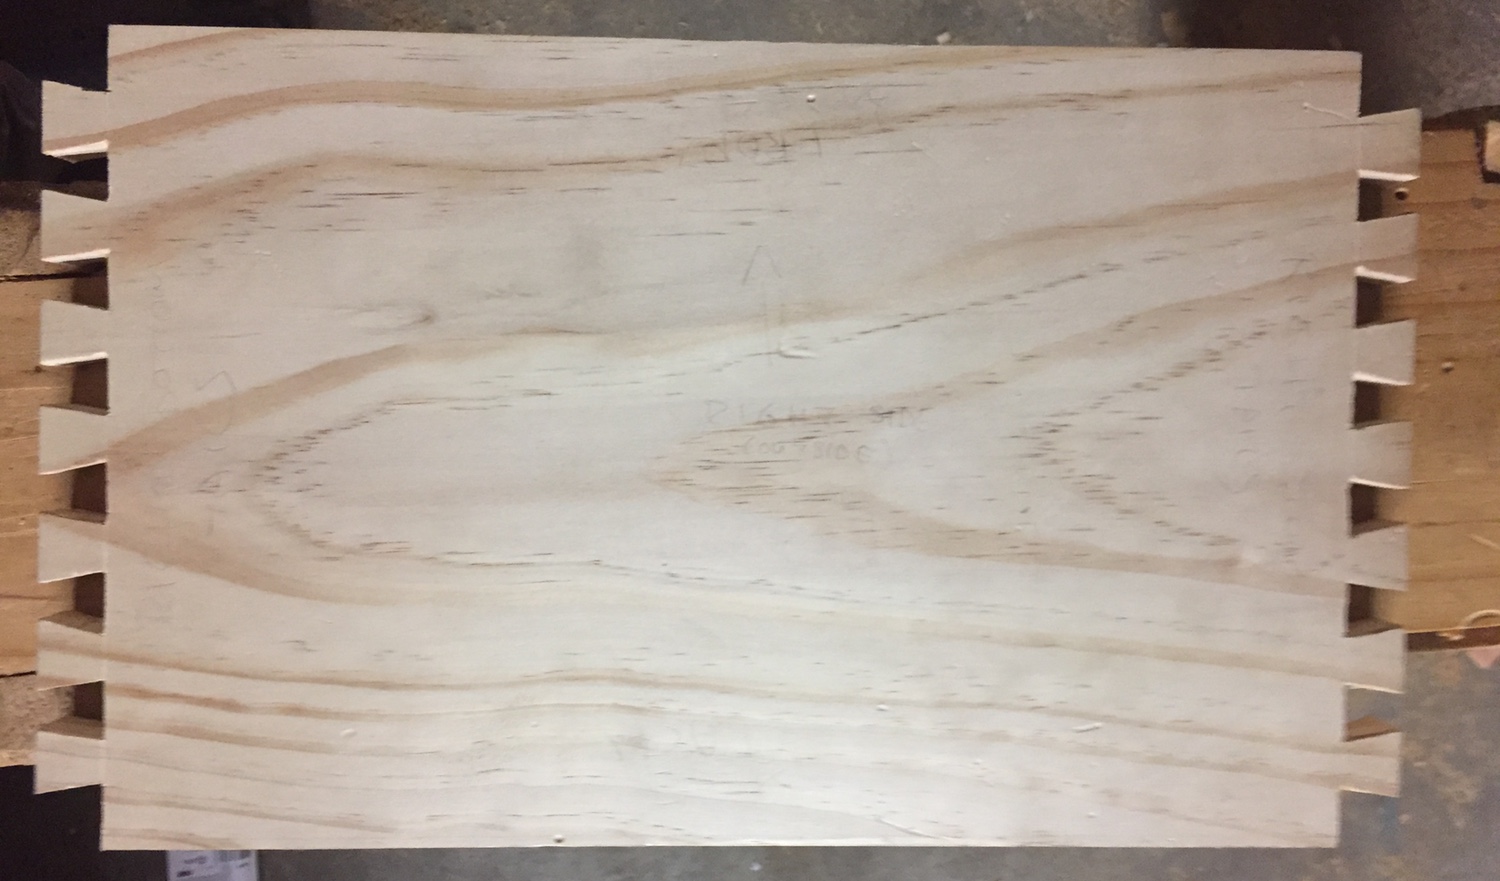
The first side panel with the tails cut. The boards were covered in annotations so that I didn't mess up the fussy cuts.
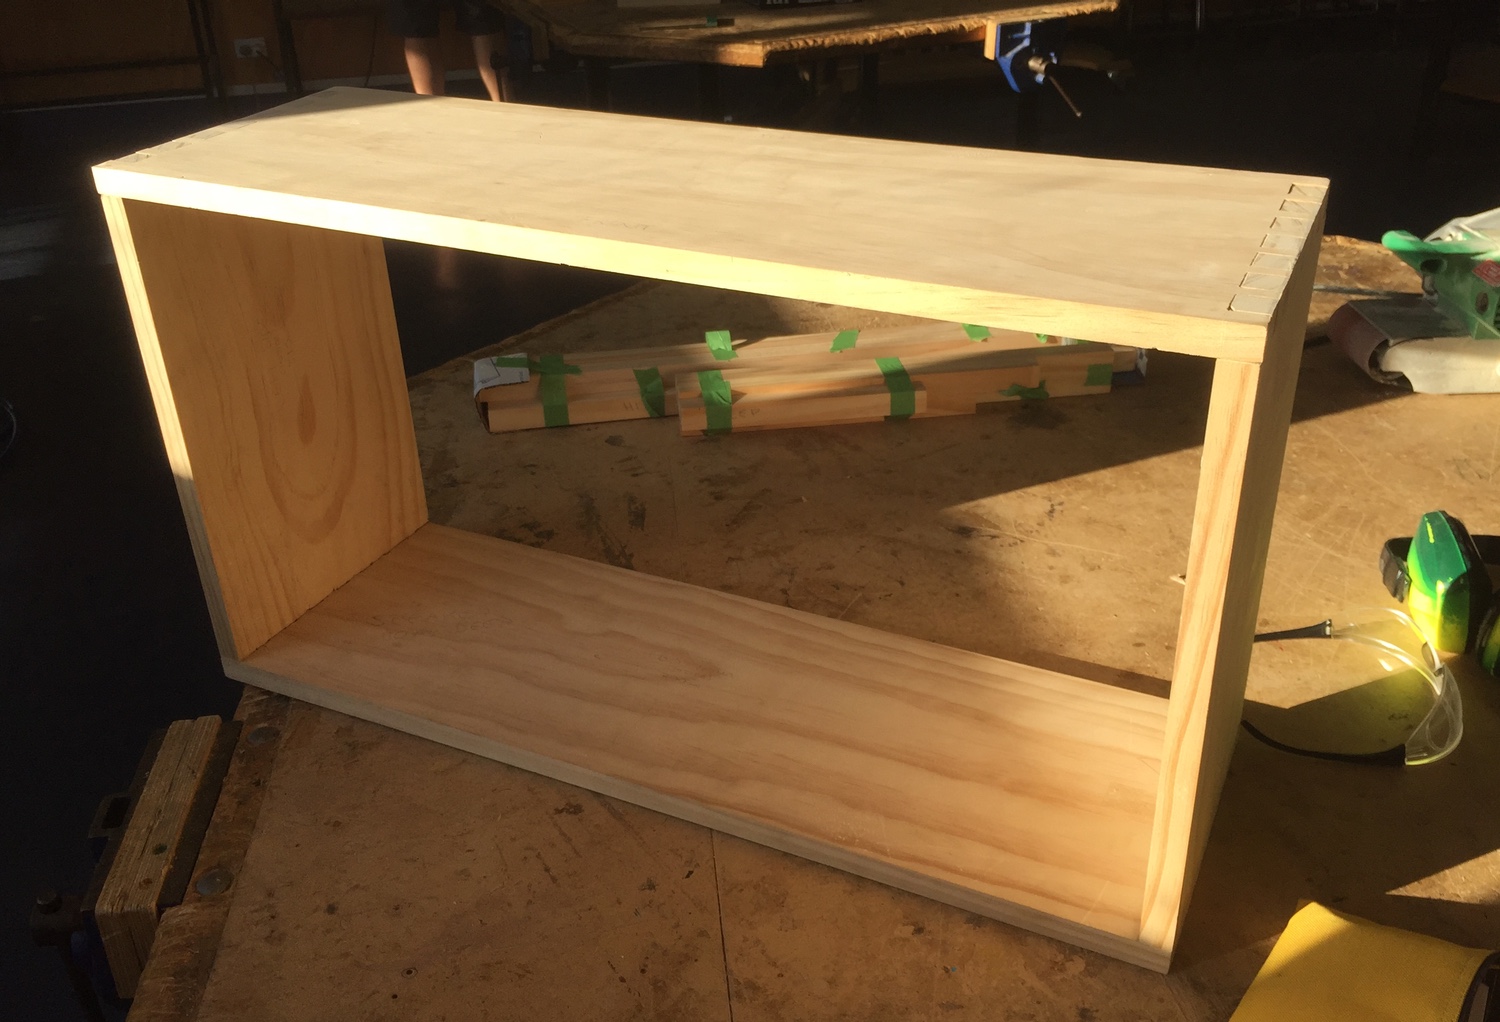
The top, bottom, left, and right panels cut and dry fitted together prior to gluing.
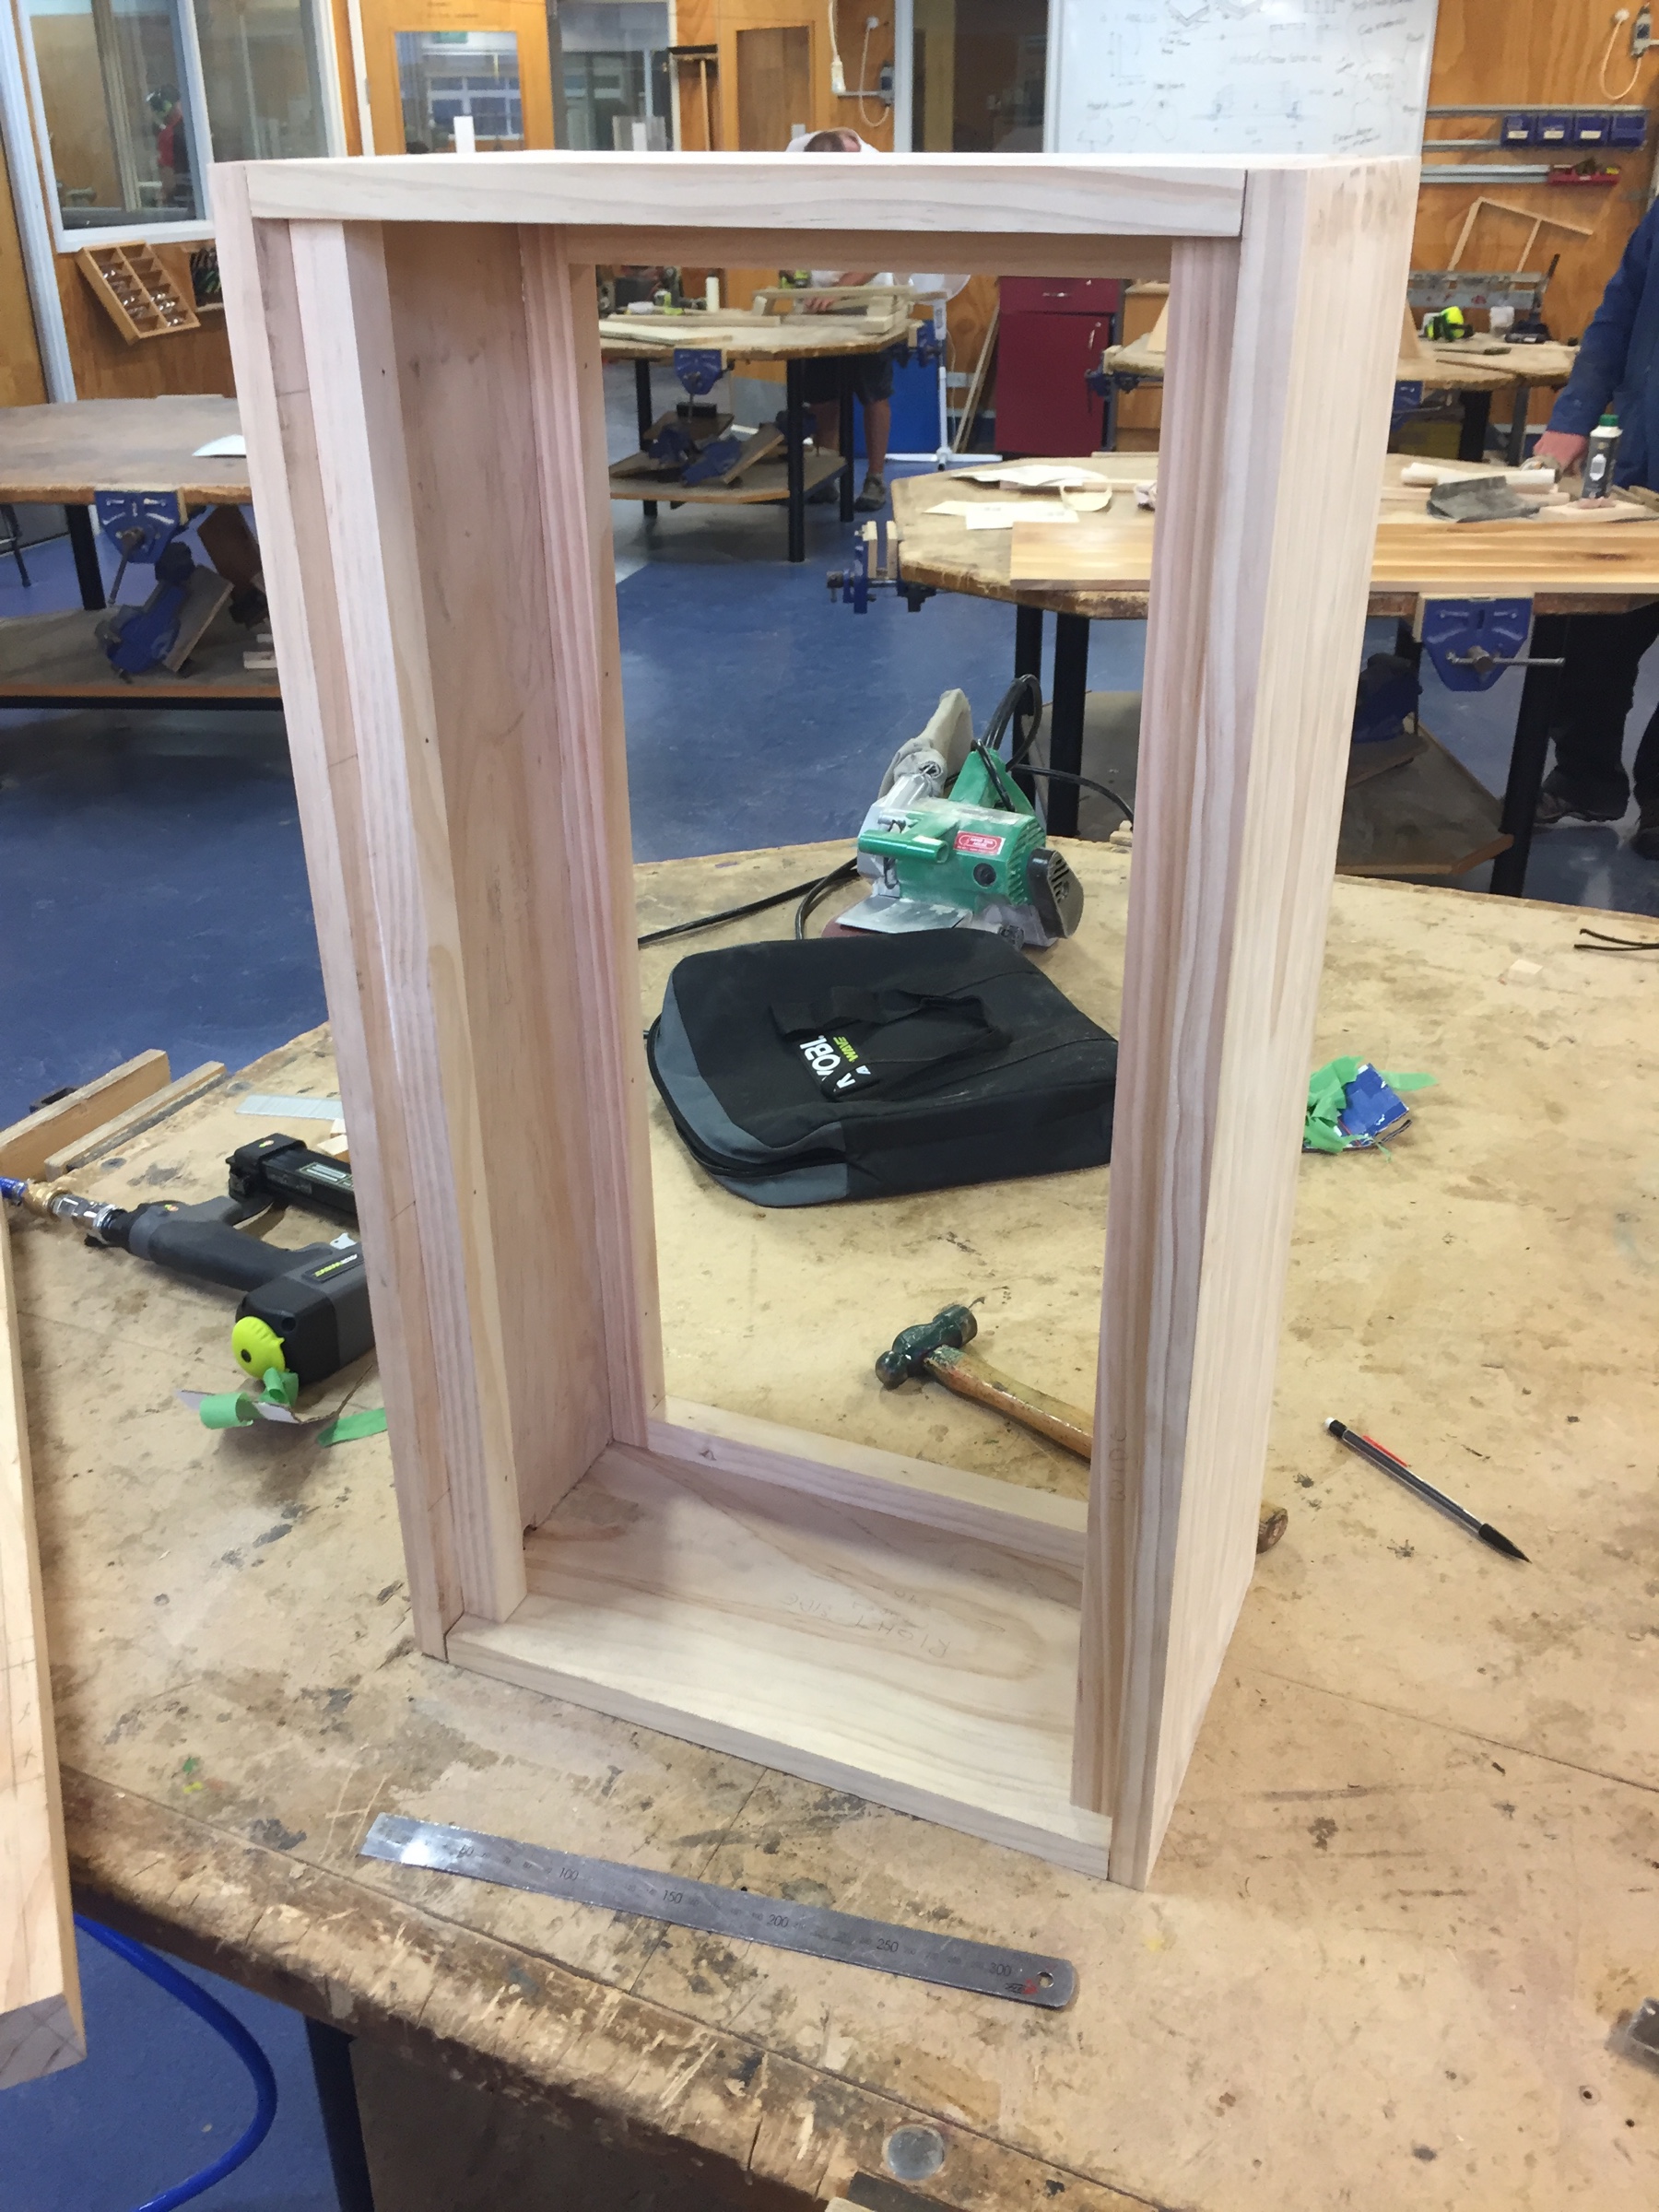
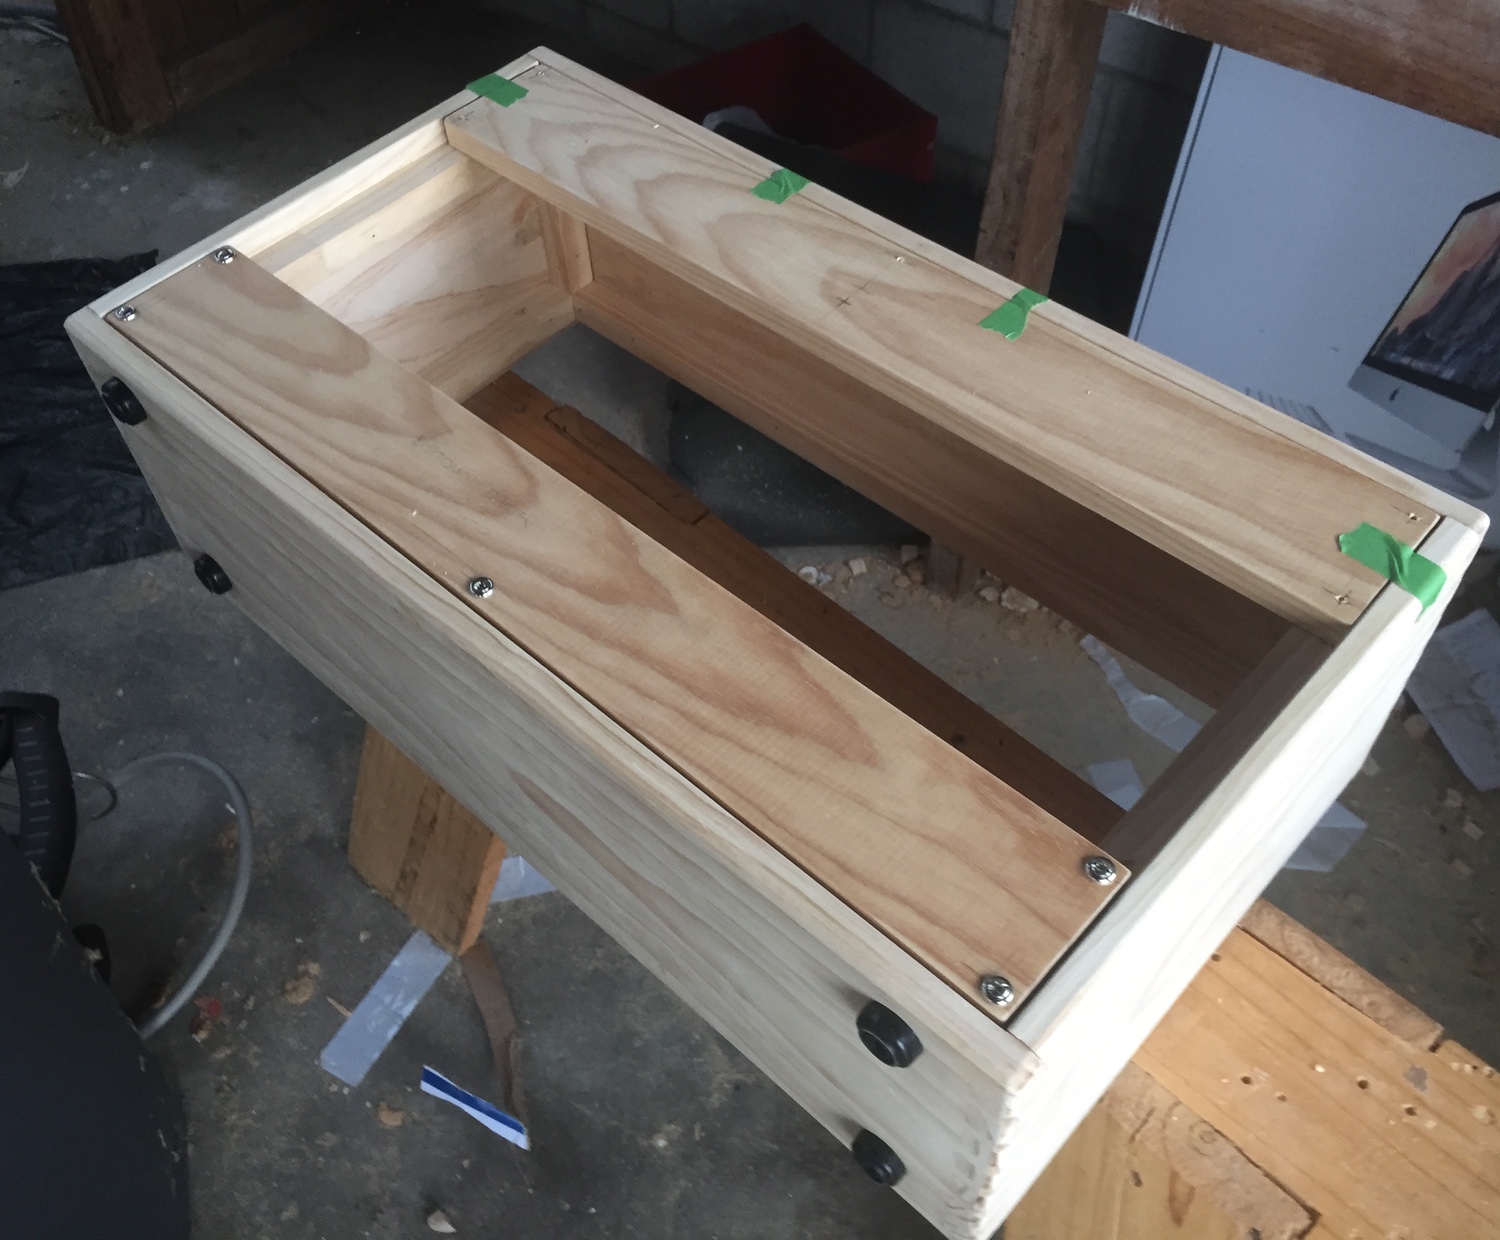
With the four main panels cut and glued, the internal frame that will support the speaker baffle and the rear panels is installed with glue and brads.
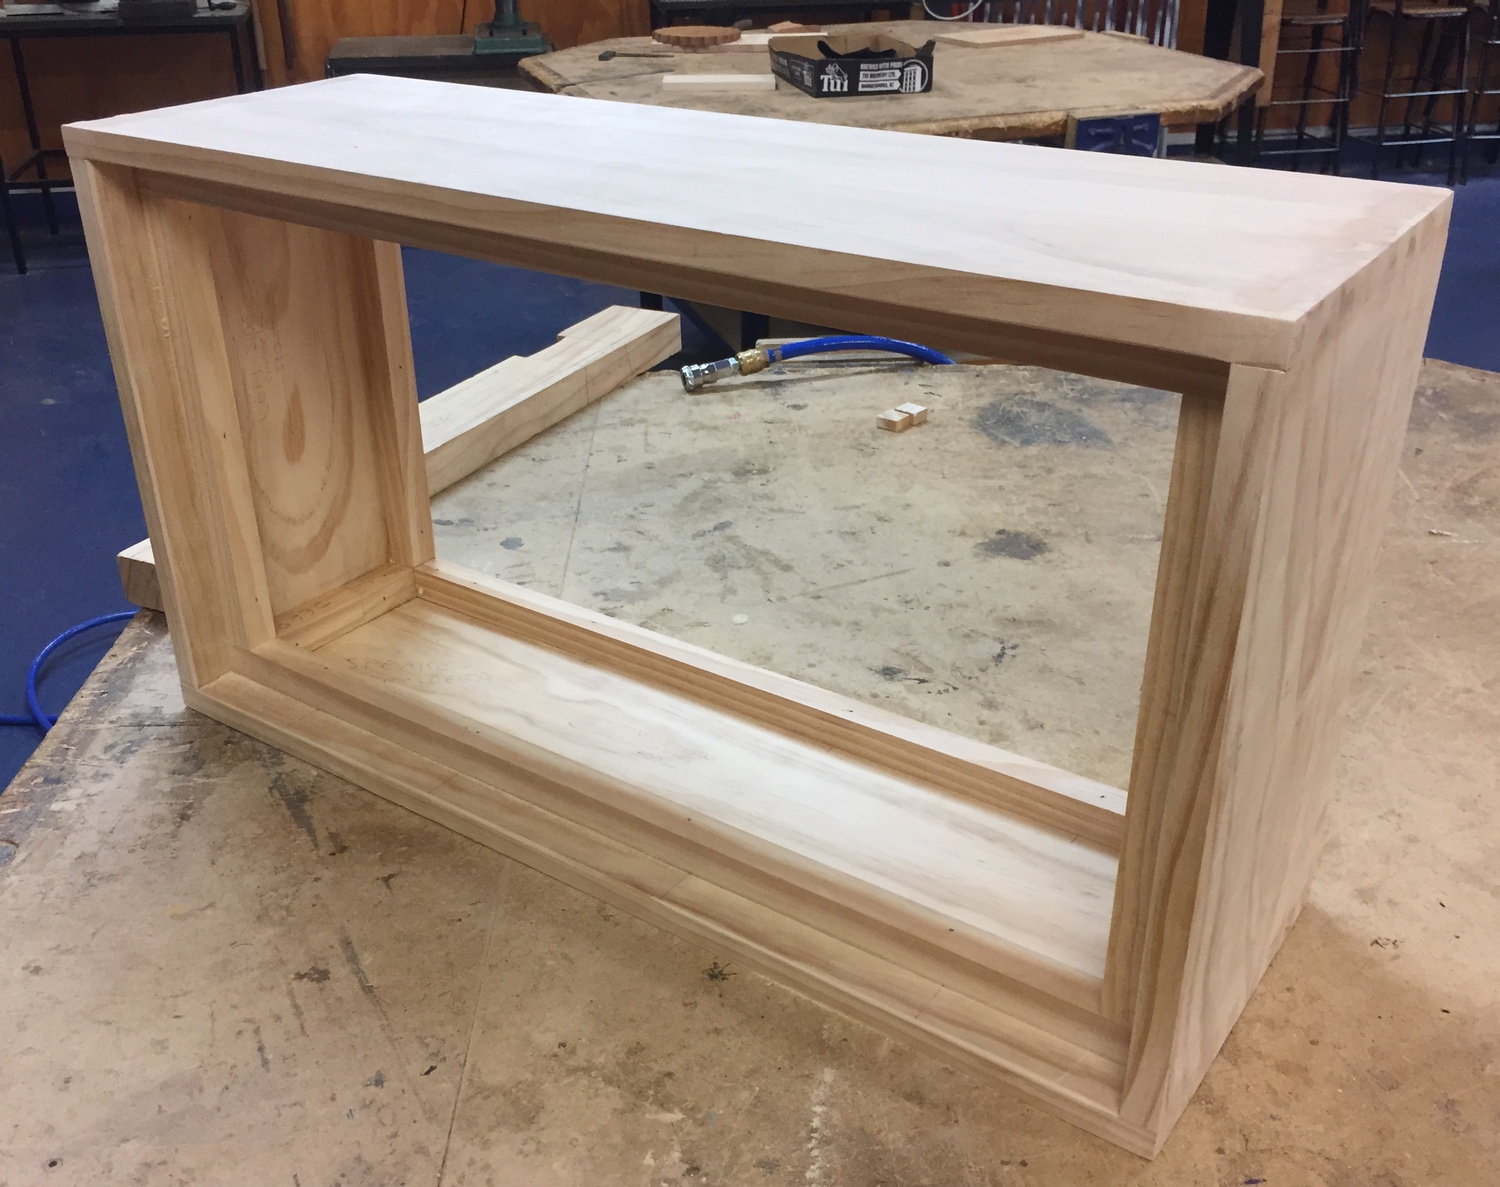
Any rough spots in the dovetails are filled with putty and the cabinet is ready to have the external edges rounded over using an electric router. This is the one job that couldn’t easily be done using hand tools alone.
With the main cabinet complete, the next job is the speaker baffle: Cut the baffle to size, cut the holes for the speakers, and install the T-Nuts for hanging the speakers.
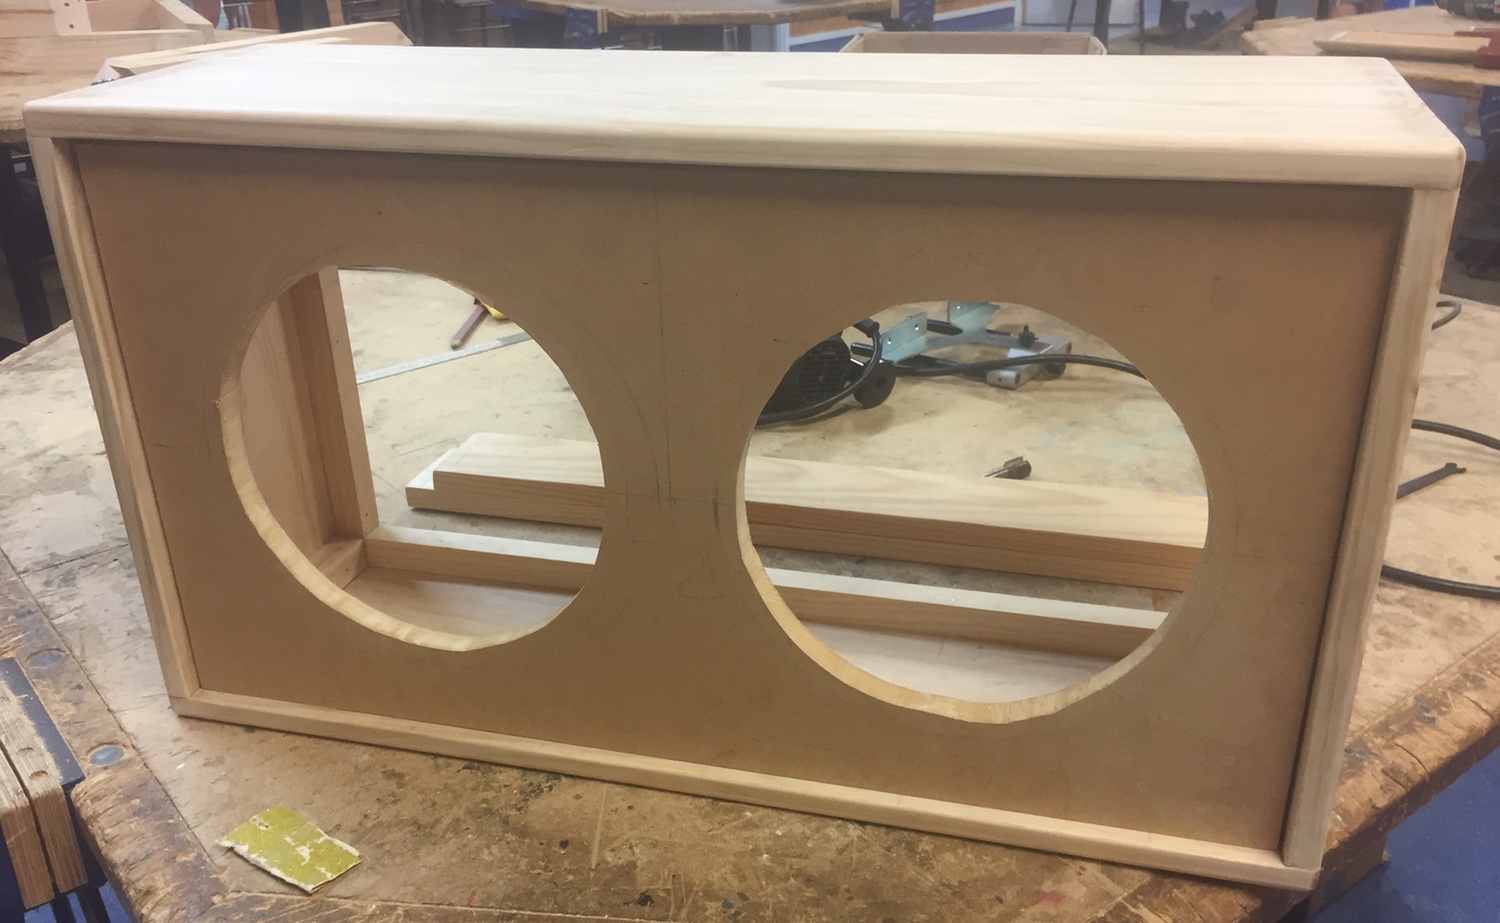
Checking that the baffle fits right, that the speaker apertures are clear of the frame, and the the baffle is sitting far enough back.
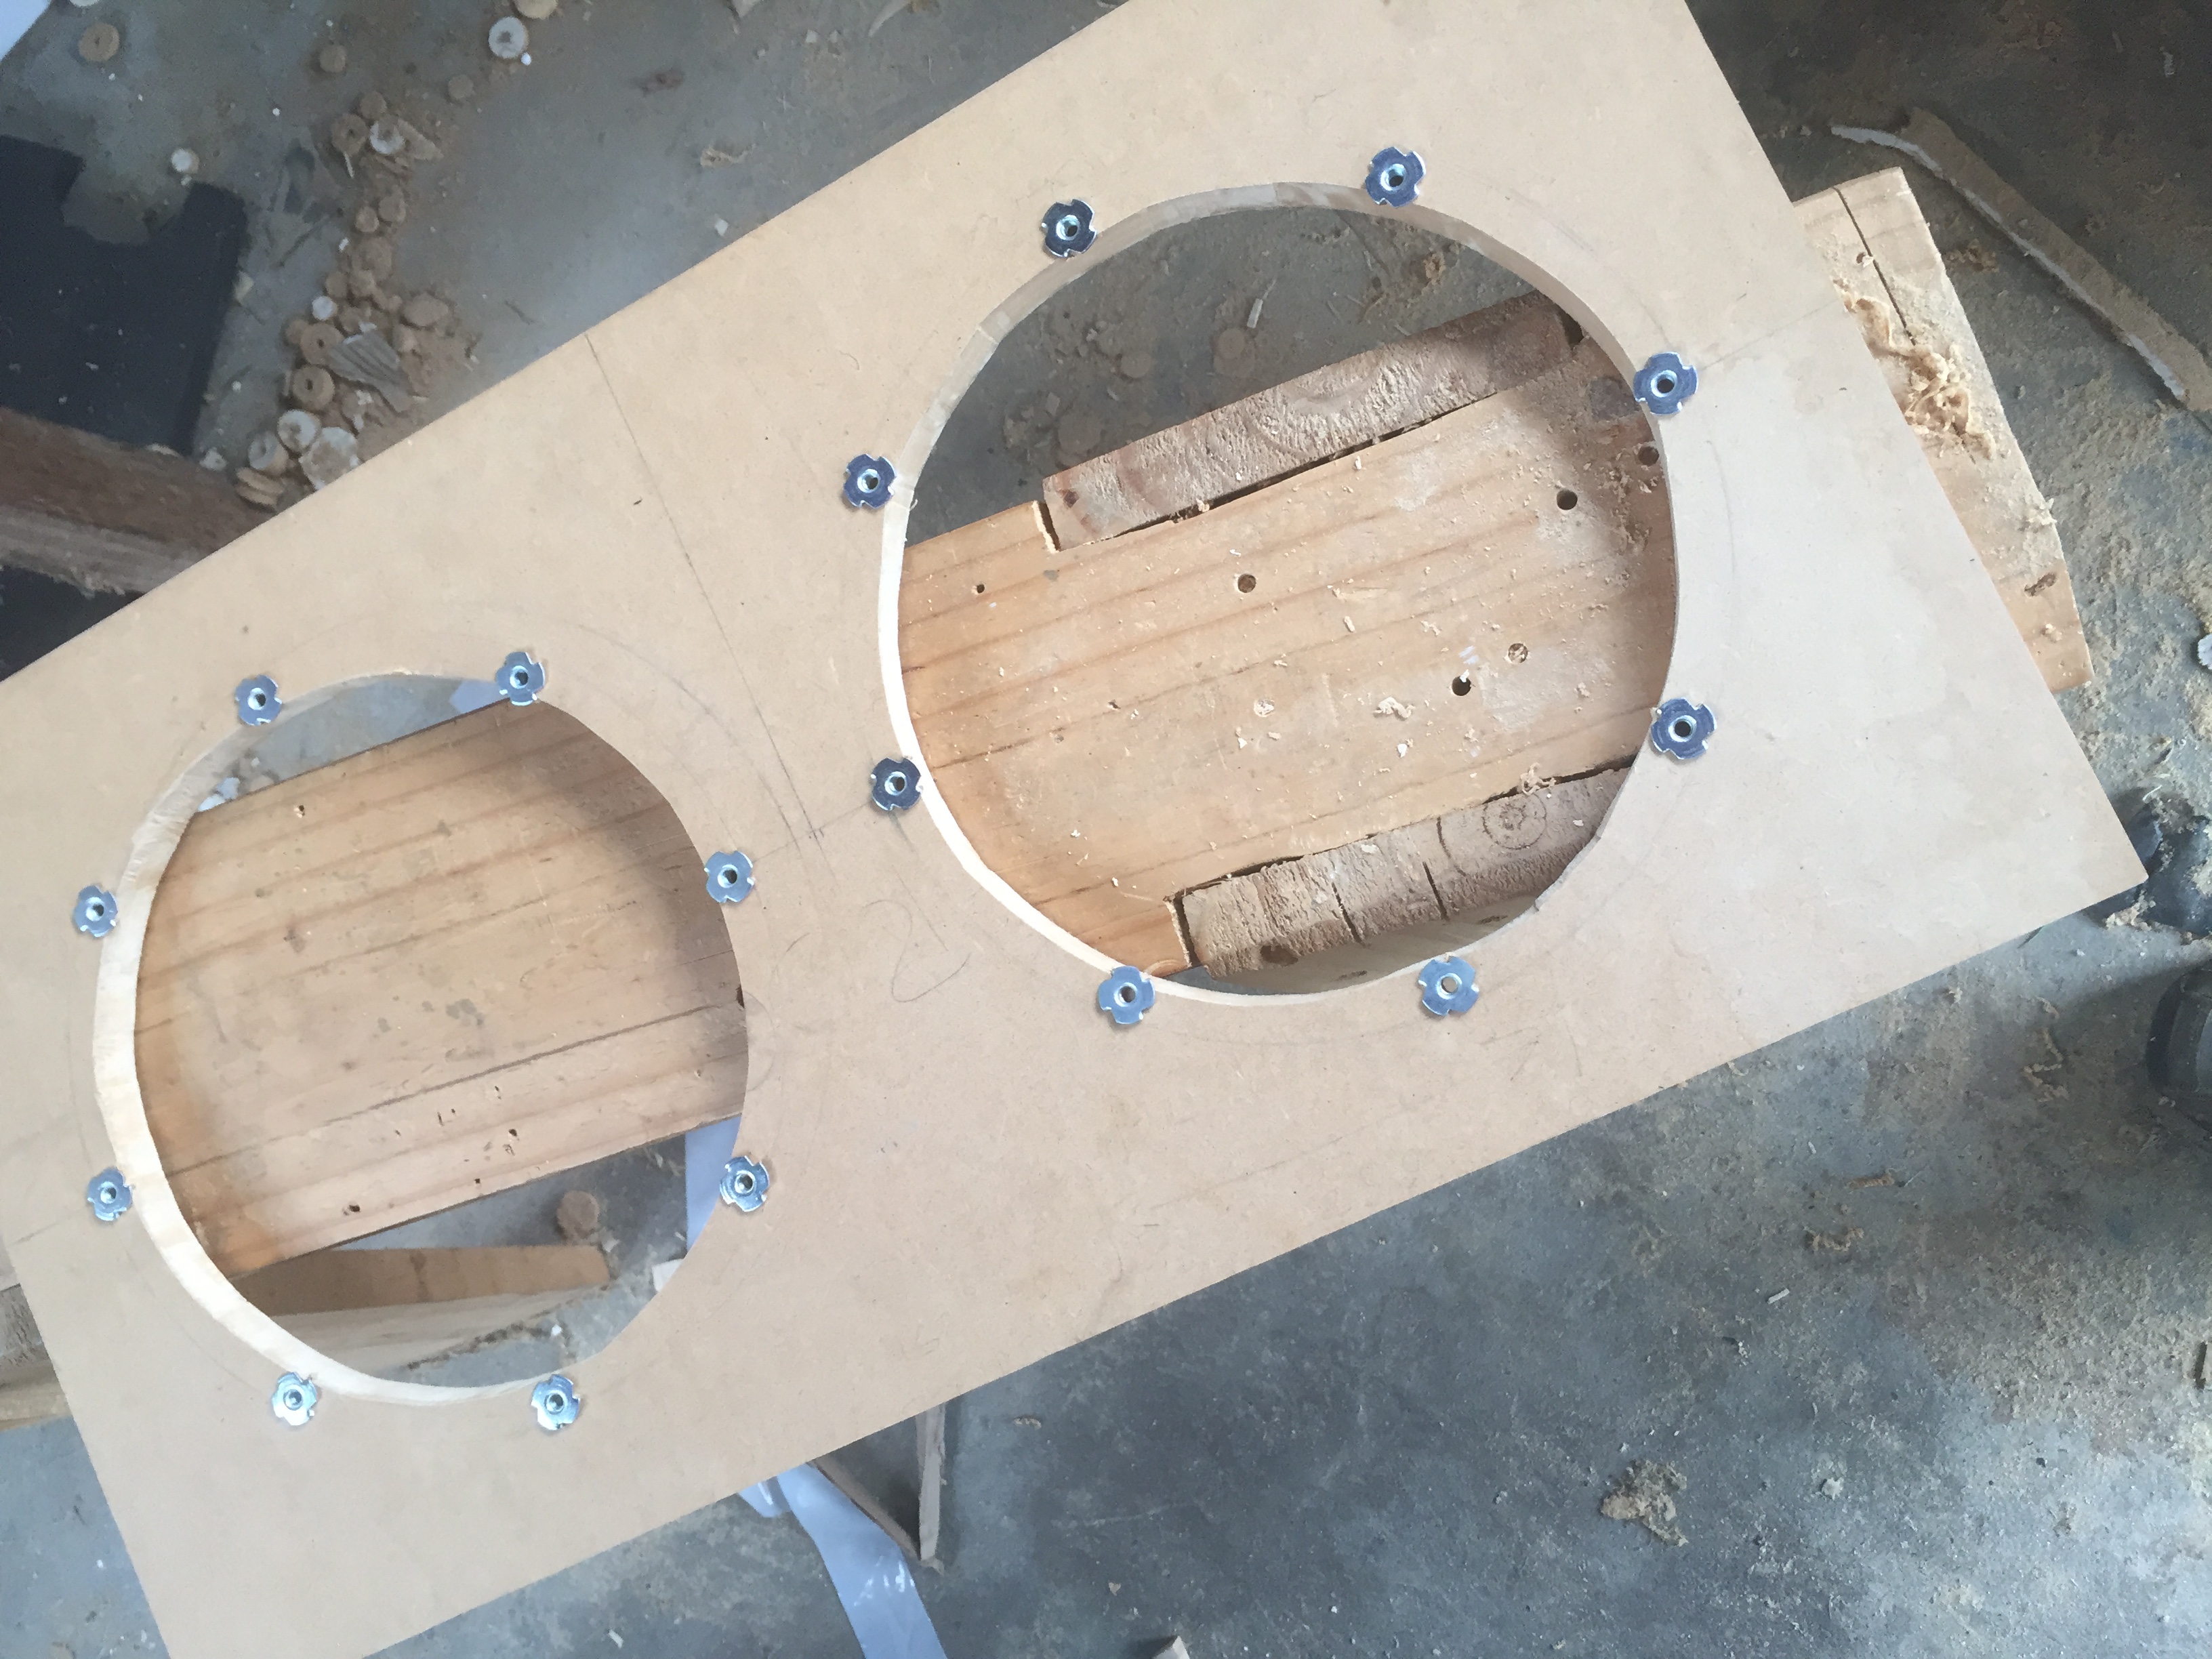
I made a real mess of cutting the circles with the jigsaw, so I opted to use all 8 mounting points available on the speaker baskets rather than the typical four. A number of the nuts are very close to the aperture.
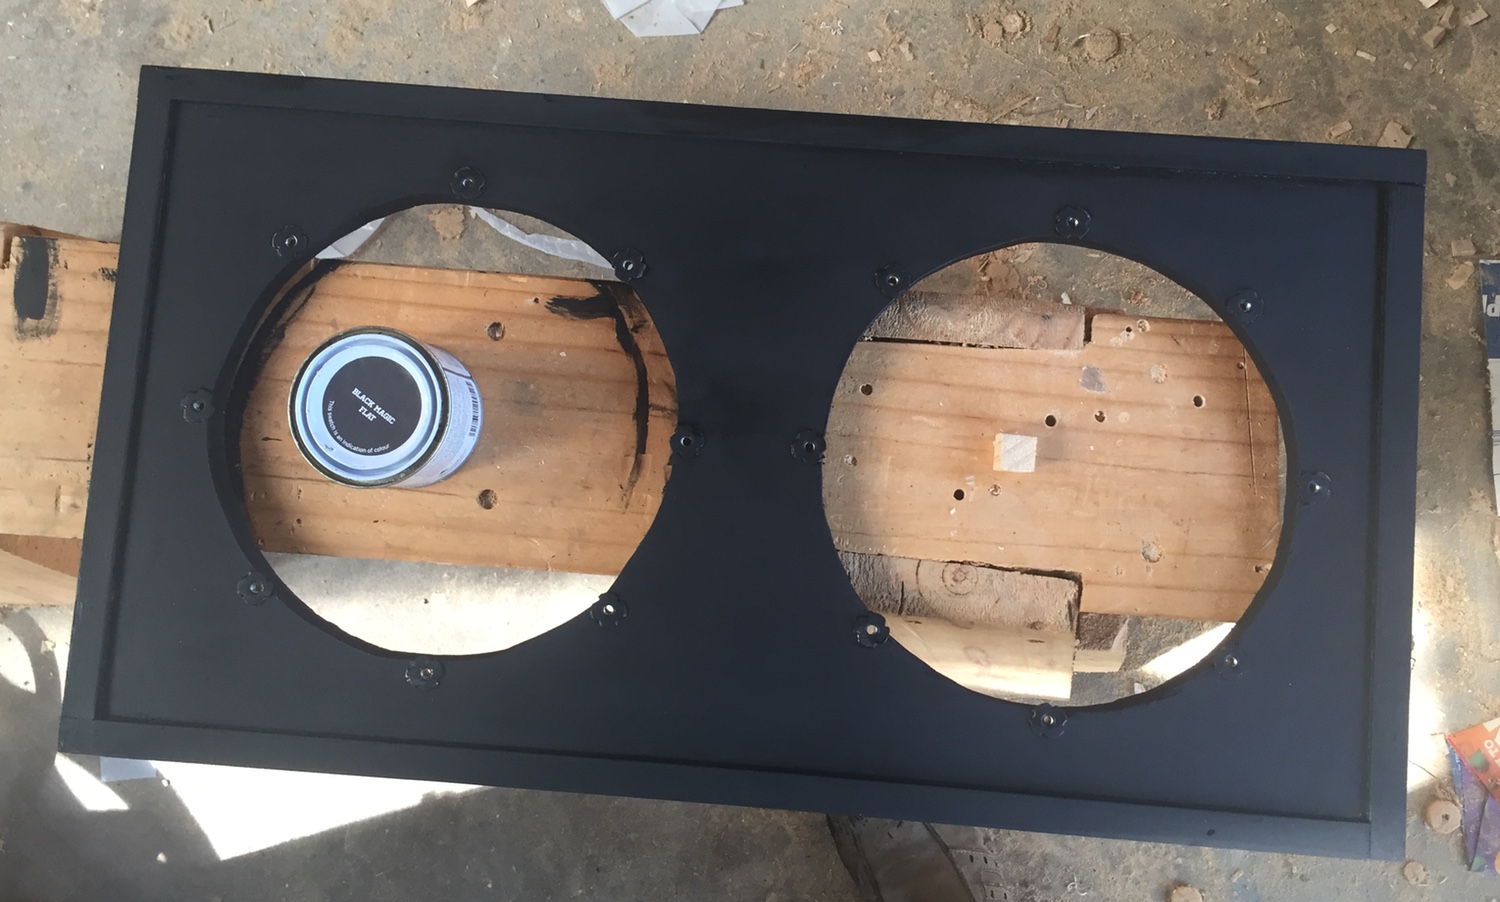
The front of the baffle is painted black prior to fitting the grill cloth. All the ugliness of the jigsaw work is hidden from view as a result. Note the addition of the skirting timber: this ensures that the grill cloth won't rattle against the baffle.
At this point it is basically a finished cabinet. Everything that remains (excluding the speakers themselves, and the socket) is largely optional: Fitting the hardware (handle, and feet), the rear panels, and covering both the cabinet and the baffle.
Here you can see the two rear panels being fitted and the feet have been installed. This is done prior to applying the vinyl covering so that drilling the holes doesn't tear the cloth. Once it's covered I did a second pass with a hot nail to cauterise the screw holes through the cloth.
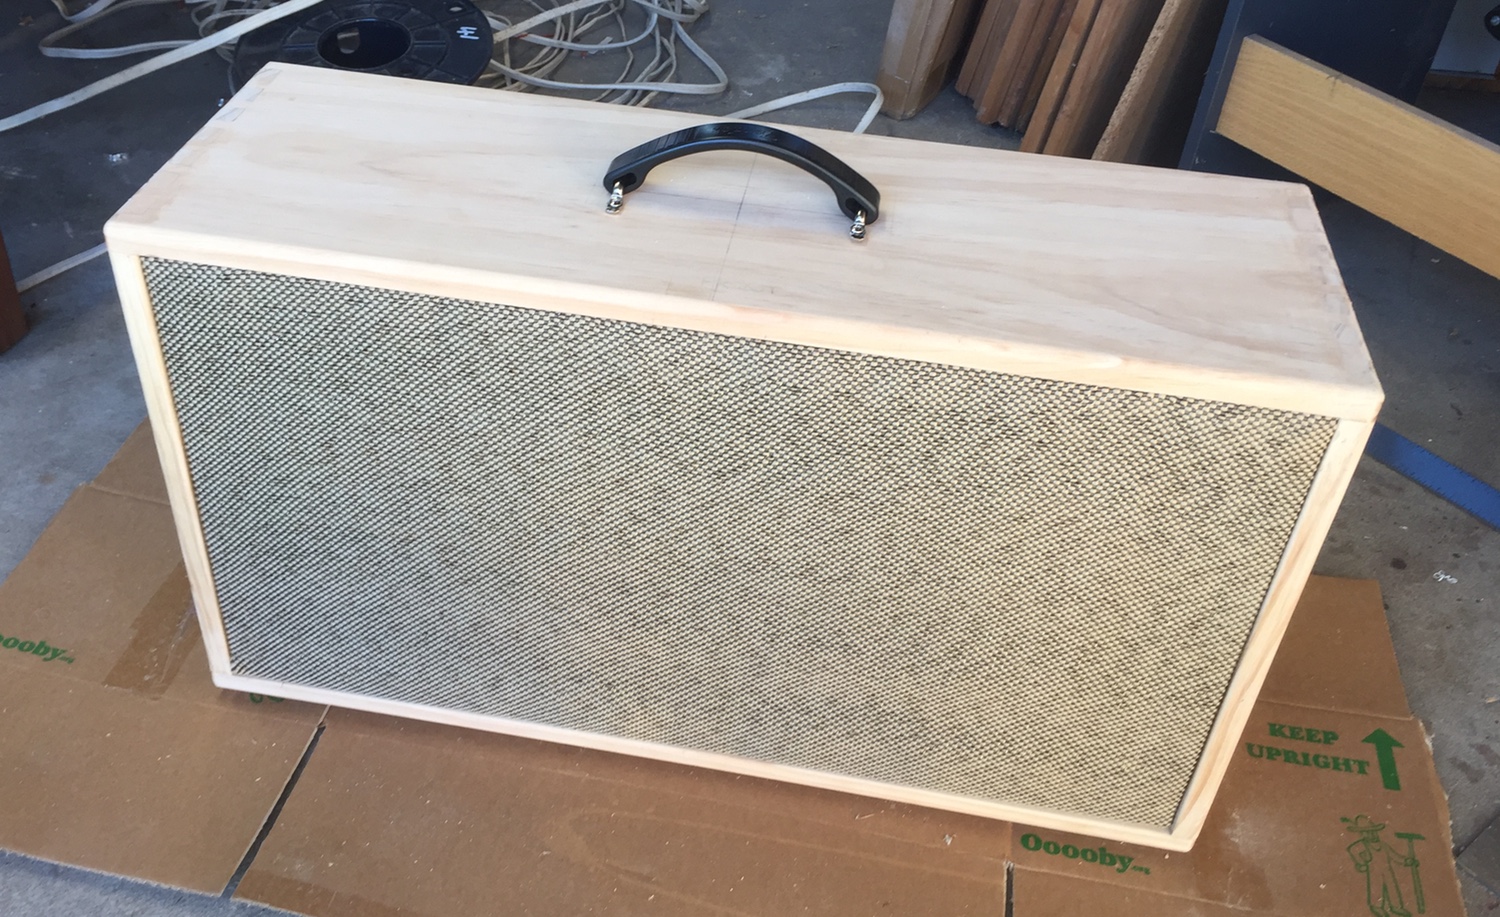
Heres the cabinet all but finished: only covering remains. If you used nicer would and did a better job of the joinery than I did, this would be finished.
Wrapping the cabinet in vinyl is a fairly tricky piece of work. I watched Uncle Doug’s videos a number of times and did a couple of test practise pieces to get the hang of the process. The brush on contact cement plus spray adhesive he suggests is pretty easy to work with.
I thought I had a lot of vinyl for the job, but it turns out it was barely enough so really plan your cutting out first.

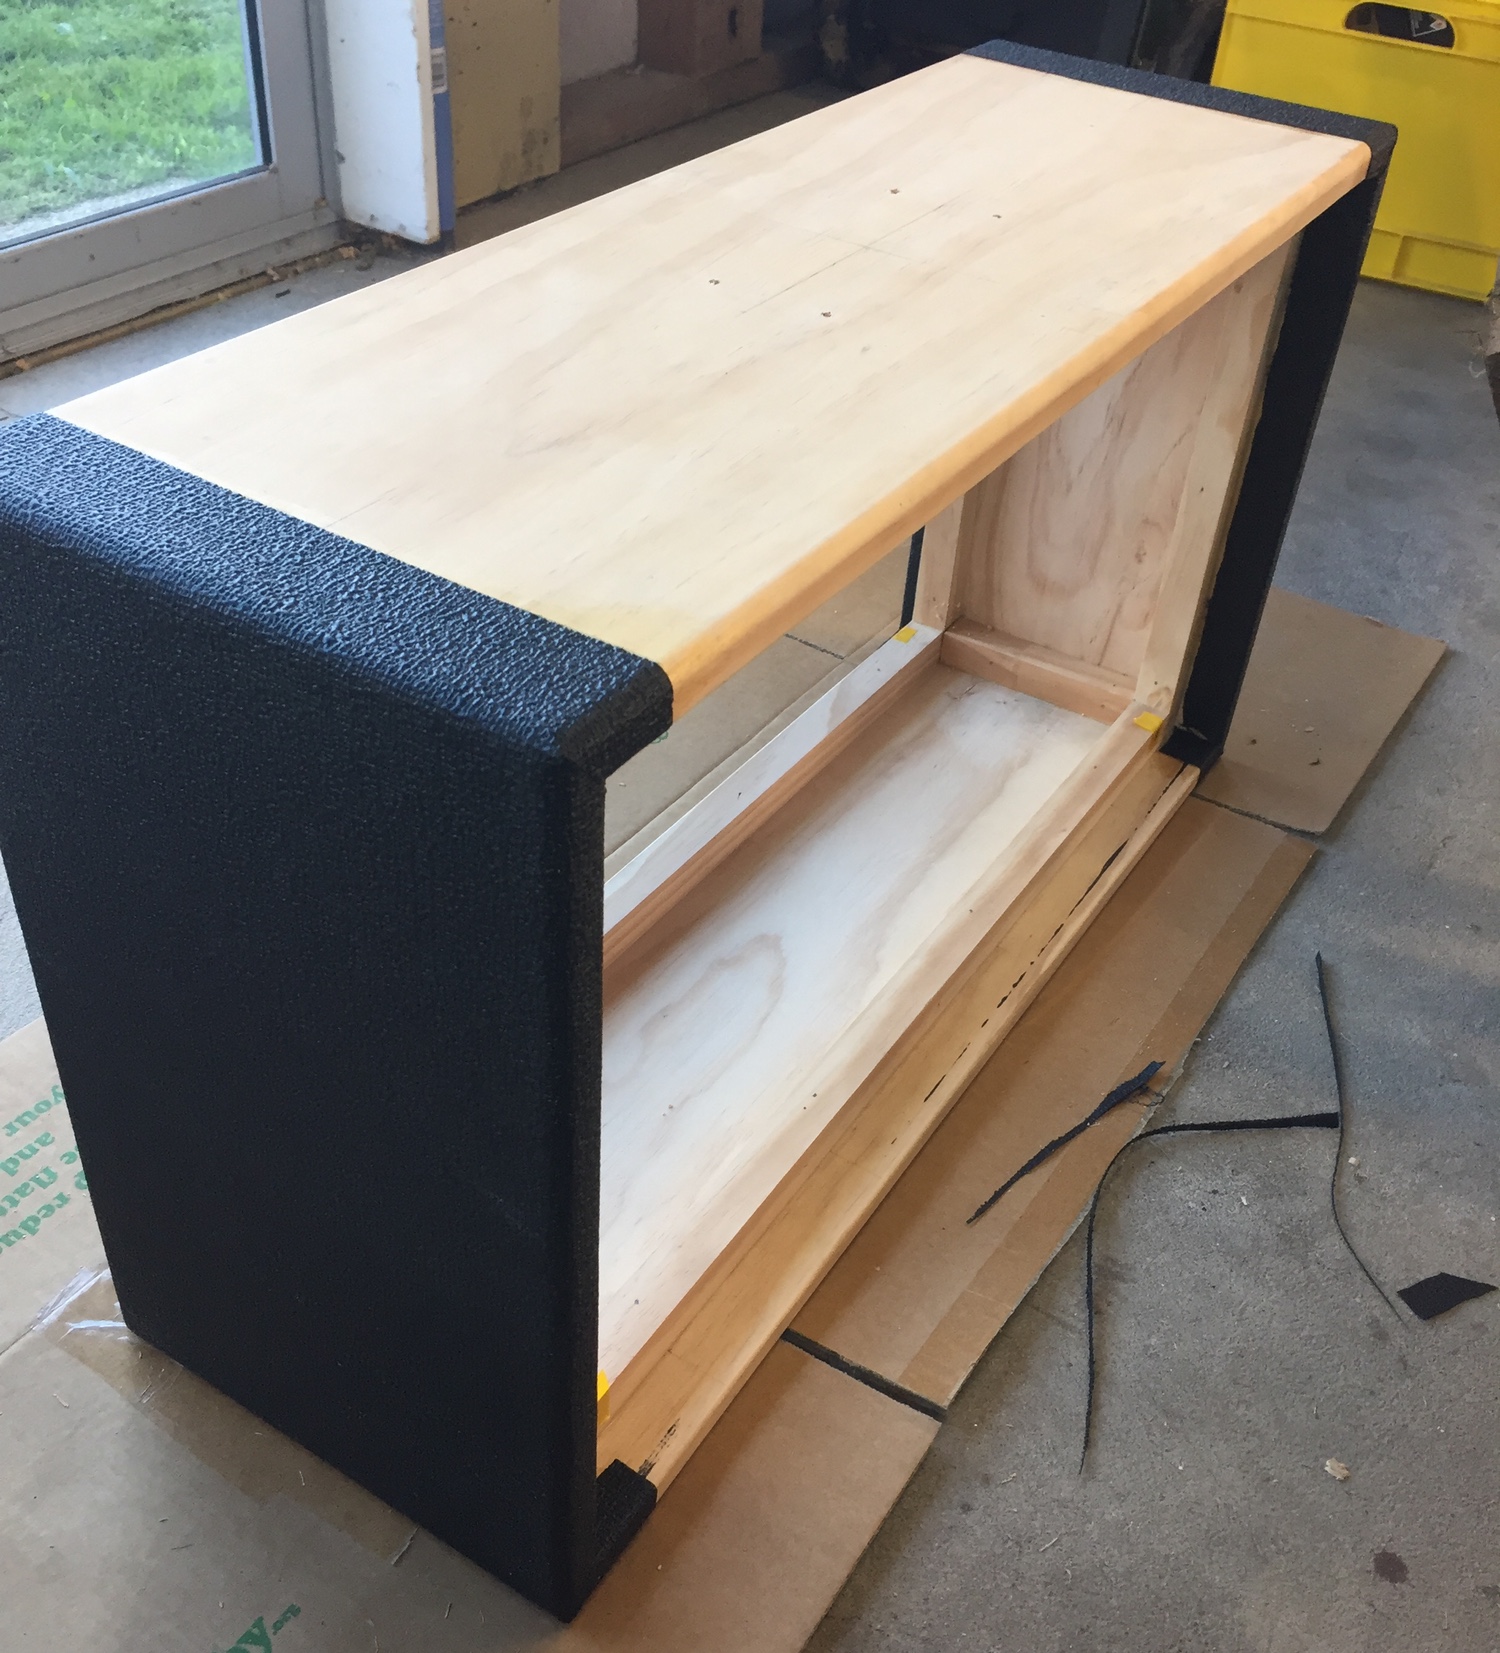
The trickiest piece of work with the vinyl is doing the corners. With the method from Uncle Doug using a four part wrap you end up doing these first. Once you get to this stage its much simpler.
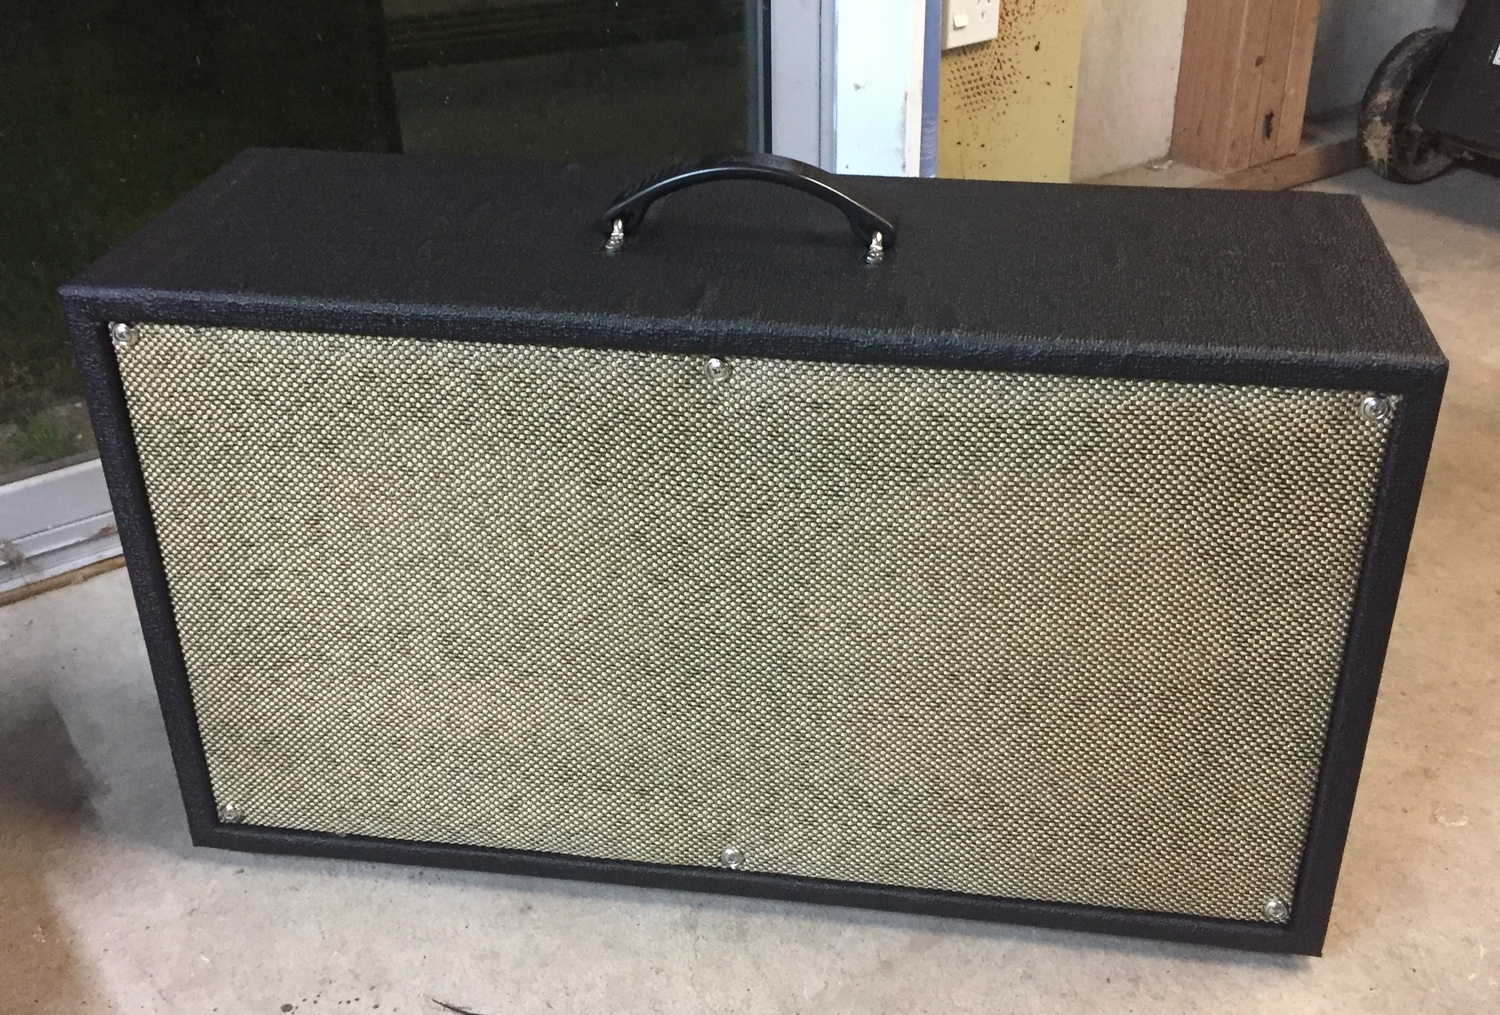
This is the final product with the hardware and baffle reinstalled.
Something funny happened with the final piece of vinyl being applied, the top. I had to open a new pot of contact cement for this piece, and something must have been funny with that batch. You can see in that previous photo some bubbling starting to form. It ended up getting really bad, and only on that piece.
This is about an hour after the hardware was reinstalled and the bubbles in the vinyl had only gotten worse.
It seemed like the contact cement was still producing some sort of gas after it was tacky, and it was also softening the vinyl. To remedy this I ended up lancing each bubble with the point of an x-acto knife smoothing it out and releasing all the trapped gas, and then once the whole top was flat again, placing a plank across the top with 10kg of weight to hold it down. I came back and repeated the process for any new bubbles that formed over the next couple of days, and by day three or four it was fine.
From conception to completion this project took about 18 months on and off. Most of that time was planning and things falling through. The actual build was about 8 weeks of evenings. If this is your first project, I'd recommend trying to find an introductory woodworking evening course, which is what I did. Having someone to run each stage of the project past, as well as access to additional tools and resources was very helpful.